Mine Ethereum Free
Learn How to Start Mining Ethereum for Free!
This is a quick tutorial on how to build a cloud mining server using a NVIDIA 1080Ti GPU to mine at between 15 to 50MH/s at $0.30 per hour with $50 free to get you up and running. If you follow this tutorial you will get some free Ethereum into your Binance account and have a server that runs 24/7 mining ETH on autopilot.
This guide is split into sections of the following:
- Sign up to a GPU cloud service and get $50 free credit.
- Install Ethereum mining software.
- Install auto reboots and start the mining server on reboot.
- Open a Binanace mining pool account.
- Get your mining URL and add your username and worker.
- Start mining.
Sign up to get a GPU mining server with $50 free.
The first step is to get your GPU server and your $50 free credit. Having searched around almost every possible provider, the cheapest provider we could find is Genesis Cloud. They offer NVIDIA 1080Ti GPUs which are perfect for mining Ethereum using the software we will show you how to install later in this tutorial. To get your $50 free credit on Genesis Cloud, sign up here.
Create an instance on Genesis Cloud.
The next step is to create an instance on Genesis Cloud. An instance is basically a VPS but this VPS is a GPU VPS which is perfect for crypto mining. When you sign into your Genesis Cloud account, click the “Create New Instance” button at the bottom.

Next we choose the following setup which is Type NVIDIA GPU with the drivers installed and a password so that you can SSH into the server when it has finished building.

Wait for the instance to finish building and we move onto installing the Ethereum mining software installation.
Install Ethereum Mining Software on Ubuntu 18.04 using NVIDIA GPU.
The first thing we do is login to your newly created instance via terminal or putty.
On Mac, open terminal and run the following commands:
- ssh ubuntu@REPLACE-WITH-YOUR-INSTANCE-IP
- Enter the password that was created for your instance.
On Windows, open putty and run the following commands:
- Enter your server IP into the (Host name or IP address) box.
- Username = ubuntu
- Password = the password that was created for your instance.
You should now be connected to your instance by terminal or putty.
Next step is to install the Ethereum packages,enter the following commands one after the other:
Note: You can install Gminer as a good alternative on both Windows and Ubuntu using the guide at the bottom of this page here.
- sudo add-apt-repository ppa:ethereum/ethereum
- sudo apt update
- sudo apt install ethereum
Wait for this process to finish and then enter the following commands to complete the installation:
- mkdir ethminer
- wget -O ethminer/ethminer.tar.gz https://github.com/ethereum-mining/ethminer/releases/download/v0.18.0/ethminer-0.18.0-cuda-9-linux-x86_64.tar.gz
- tar xzf ethminer/ethminer.tar.gz -C ethminer/
That is all there is to it. Your Ethereum mining software is installed and ready to mine.
Next step is to sign up to Bianance and create your pool mining profile.
If you haven’t already got a binanace account, you can create one here. You will be mining directly from your instance into a Binanace ETH pool.
1, Login to your Bianace account.
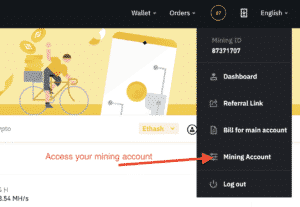
2, Access or create your Mining Account from the main menu:
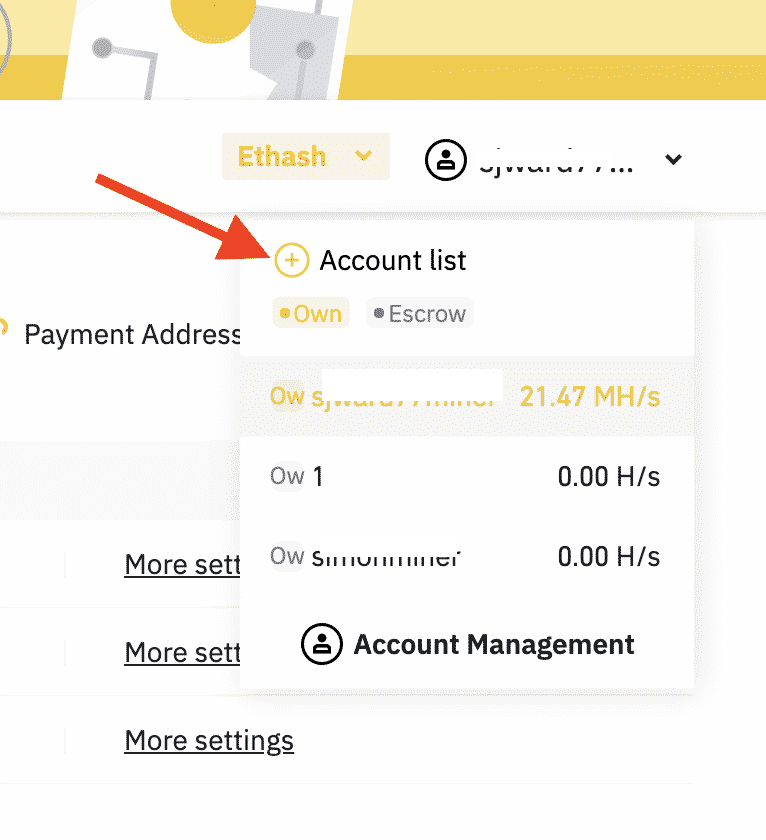
3, Click “Account Management” in the menu and then “Account List”:
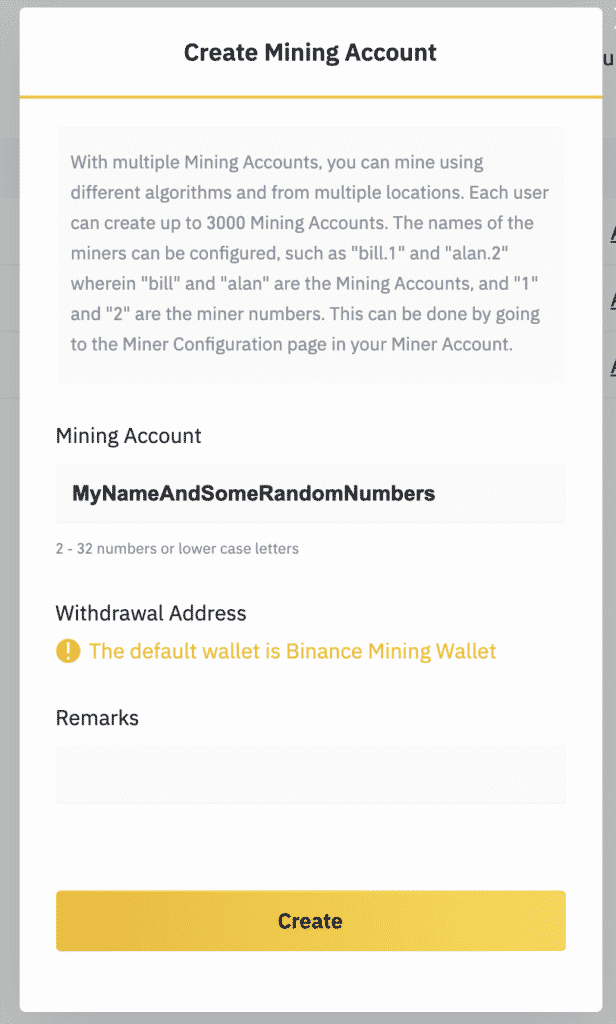
4, Enter an account name, use your own name and some random numbers, try to make it as unique as possible so that no one else is mining into the pool with the same username, otherwise you would be mining for someone else. Leave remarks blank and click “Create”.
5, Click “Workers” in the top menu and then click “SHA256” to change it to “Ethash”:

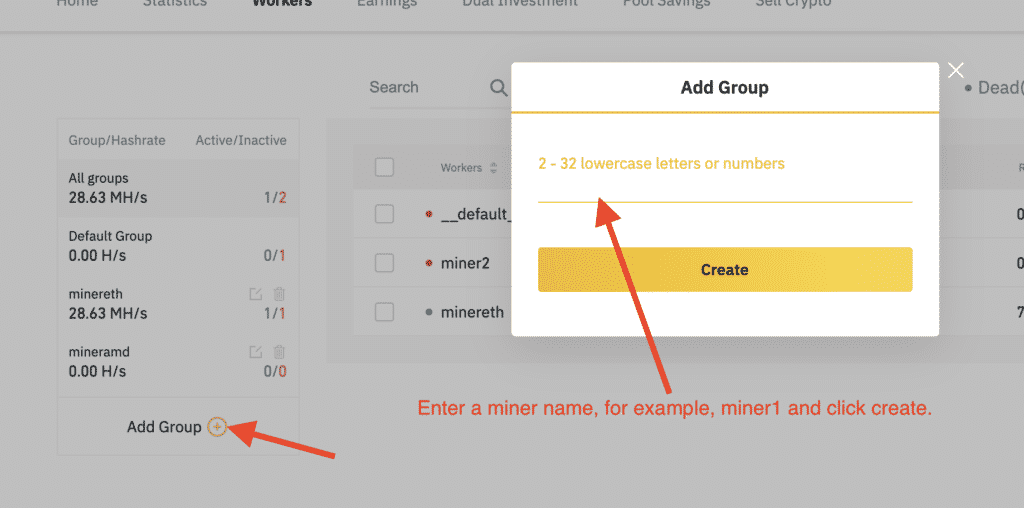
6, On the left menu, click “Add Group” and enter a name into the popup box, this will be your miner group name. When you start mining on multiple servers, you can add each server to a group so you can see how each server is doing with the mining. This is optional but recommended.
7, You have now created your miner username and miner group name, you are ready to start mining with your server.
With Binance you have a choice of Pool URLS to mine Ethereum:
stratum+tcp://ethash.poolbinance.com:443
stratum+tcp://ethash.poolbinance.com:1800
stratum+tcp://ethash.poolbinance.com:25
stratum+tcp://ethash.poolbinance.com:3333
stratum+tcp://ethash.poolbinance.com:8888
It doesn’t matter which one you choose with your mining server as it is compatible with all 5, but we will use the first one in the list to start mining.
You created an account name and a group name in the previous steps. You will use these to create the command you paste into terminal or putty. You should already be logged into your server to run the command.
Your mining URL should look like this, replacing ACCOUNTNAME with the account name you created in step 4 and replace GROUPNAME with the name you created in step 6:
stratum1+tcp://[email protected]:443
Now go back to terminal or putty and simply paste the edited command below:
cd ethminer/bin && ./ethminer -P stratum1+tcp://[email protected]:443
Give it about 5 minutes and check the statistics tab on your Binance miner account, it should show something like this:
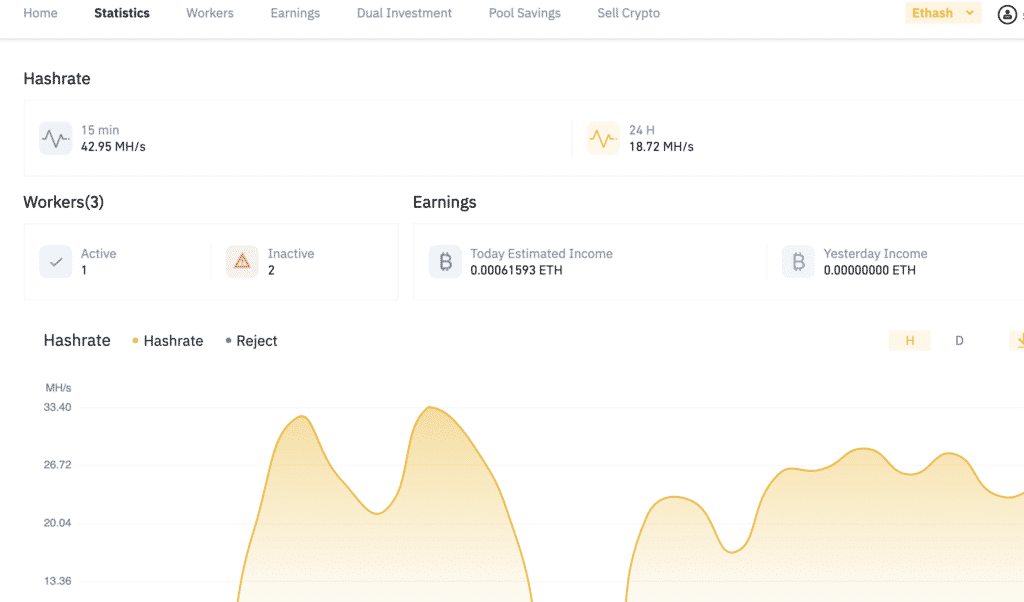
The above is after around 15 hours of mining, you just need to make sure it shows a hashrate in the top left. If it shows a hashrate then you are mining for Ethereum.